

Butterfly Valve Installation Instructions | Butterfly Valve Installation Steps Instructions
Time:
Jan 10,2023
Author:
Source:
Butterfly Valve Installation Instructions
一、Reference for use before butterfly valve installation:
1. Before the butterfly valve is installed and operated, use air spray to remove foreign objects on the piping, and clean the inner surface of the piping with clean water.
2. Check carefully whether the use of the butterfly valve conforms to its performance specifications; (temperature, pressure)
3. Check whether there is any debris on the channel and sealing surface of the butterfly valve, and remove it in time;
4. The butterfly valve shall be installed in time after unpacking, Do not loosen any fastening screws or nuts on the valve at will;
5. Wafer butterfly valves must use special butterfly valve flanges.
6. The electric butterfly valve can be installed on the pipeline at any angle. For the convenience of maintenance, it is recommended not to install it upside down.
7. When installing the butterfly valve flange, it is necessary to ensure that the flange surface and the sealing rubber are aligned, the screws are evenly tightened, and the sealing surface must be intact; if the screw tightening force is uneven, the rubber bumps will block the butterfly plate or resist the butterfly. The plate causes leakage at the valve stem.
二、Butterfly valve installation steps:
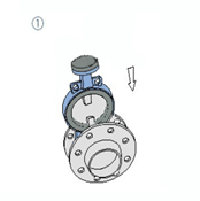
1. Place the butterfly valve between the two preinstalled flanges;
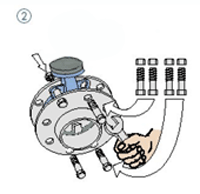
2. Gently insert four pairs of bolts and nuts into the flange holes as shown in the figure, and tighten the nuts slightly to correct the flatness of the flange surface;
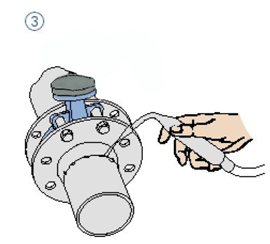
3. Fix the butterfly valve flange to the pipeline by spot welding;
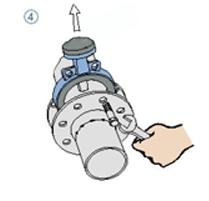
4. Remove the butterfly valve;
5. The flange is completely welded and fixed on the pipeline;
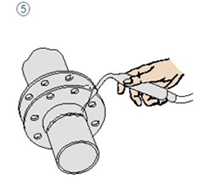
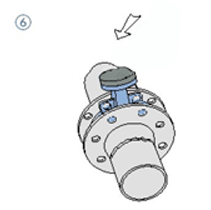
6. Install the butterfly valve after the welding port has cooled down. Ensure that the valve has enough space in the flange to prevent the valve from being damaged, and ensure that the valve plate has a certain degree of opening;
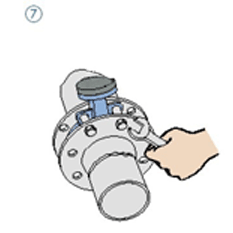
7. Correct the position of the butterfly valve and tighten the four pairs of bolts (be careful not to over tighten)
8. Open the butterfly valve to ensure that the valve plate can be opened and closed freely, and then slightly open the valve plate;

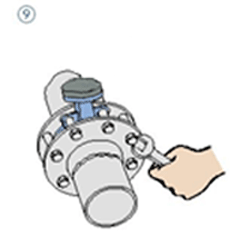
9. Tighten all nuts in a cross balance;
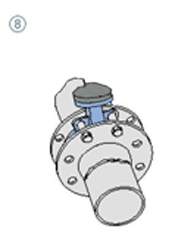
10. Reconfirm that the valve can open and close freely. Note: Confirm that the valve plate does not touch the pipe.
In addition: If the installed valve is an electric butterfly valve, the opening and closing stroke of the control mechanism has been adjusted when the electric butterfly valve leaves the factory. In order to prevent the wrong direction when the power is turned on, the user must manually open it before turning on the power for the first time. To the half (50%) position, press the electric switch again, check the switch, and check the opening direction of the direction valve on the indicator plate.

SEARCH CONTENT
Please enter the search keywords below to search for the products you are interested in
Arnos welcome new and regular customer for visiting!